Hack Smarter - Hunter Writeup
A walkthrough of the Hack Smarter Challenge Lab - Hunter. It mainly covers user enumeration in the target's external login portal.

Lab Link: https://www.hacksmarter.org/courses/19723a54-6e4b-410e-b9e3-371f702e0f5c
Author: Tyler Ramsbey
Difficulty: Easy
Objective / Scope
You are an operator for the Hack Smarter Red Team, currently conducting a black-box assessment on a client’s external login portal. As part of the initial reconnaissance phase, our OSINT analysts have compiled a list of potential usernames.
You need to identify which one is a valid username for the web application.
Port and Service scan using Nmap
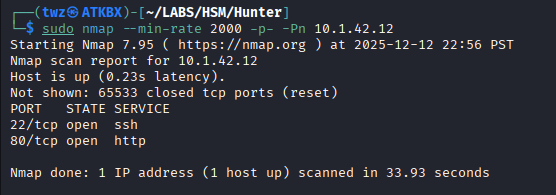
We start the engagement by running Nmap to identify all open ports of our target 10.1.42.12. As seen on the screenshot below, there are two open ports for this server, port 22 (SSH) and port 80 (HTTP).
1
sudo nmap --min-rate 2000 -p- -Pn 10.1.42.12
Breakdown of the command:
sudo nmap: Run Nmap.--min-rate 2000: This tells nmap to send at least 2000 packets per second. This allows us to quickly scan the target.-p-: This tells nmap to scan all TCP ports (1-65535).-Pn: Skips host discovery (ping) and assumes that the target is online.10.1.42.12: This is the target machine.
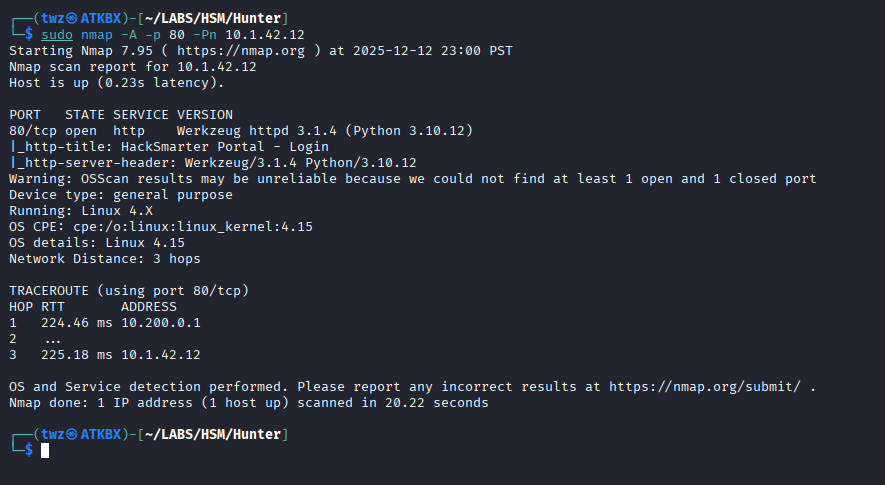
We ran nmap again to perform a service scan. Since the scope specifies that we will be performing assessment on the external login portal, we only scan for the port 80 (HTTP). As seen on the screenshot below, the server runs httpd v3.1.4 and we also identified that it’s a Linux machine.
1
sudo nmap -A -p 80 -Pn 10.1.42.12
Breakdown of the command:
sudo nmap: Run Nmap.-A: Run Version detection, OS Detection, Default script scanning, and trace route.-p 80: Only scan port 80-Pn: Skips host discovery (ping) and assumes that the target is online.10.1.42.12: This is the target machine.
Navigating the Website
We then went straight to navigating the website to know how it works and if there are any unique functionalities that we can take advantage of. We would also need to capture the requests using Caido while using the website.
Setting up Caido Scopes and Filtering
Before we start capturing requests, an optional but a good practice that we can do is setup the scope for this engagement first. This allows us to only see requests/responses to and from our target which makes our HTTP History much cleaner and easier to work on.
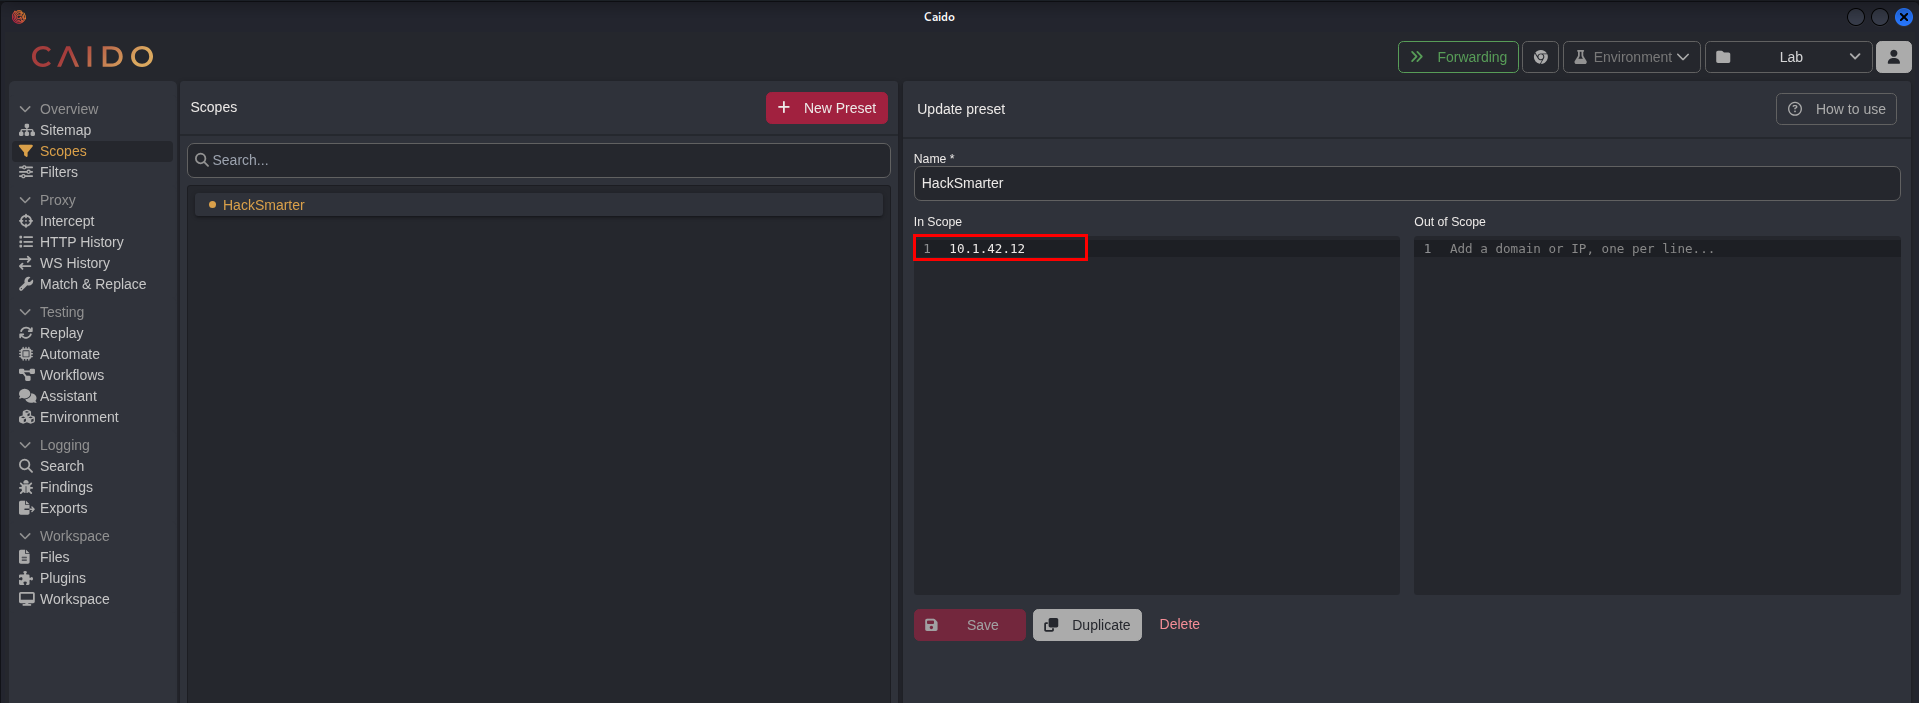
To set the scope in Caido, navigate to the Scopes in the menu similar to the screenshot below. Click the New Preset button to create a preset for this lab, you can name this anything you like but for this example we named it HackSmarter. Then under the In Scope section, add the IP of your target machine and click save.
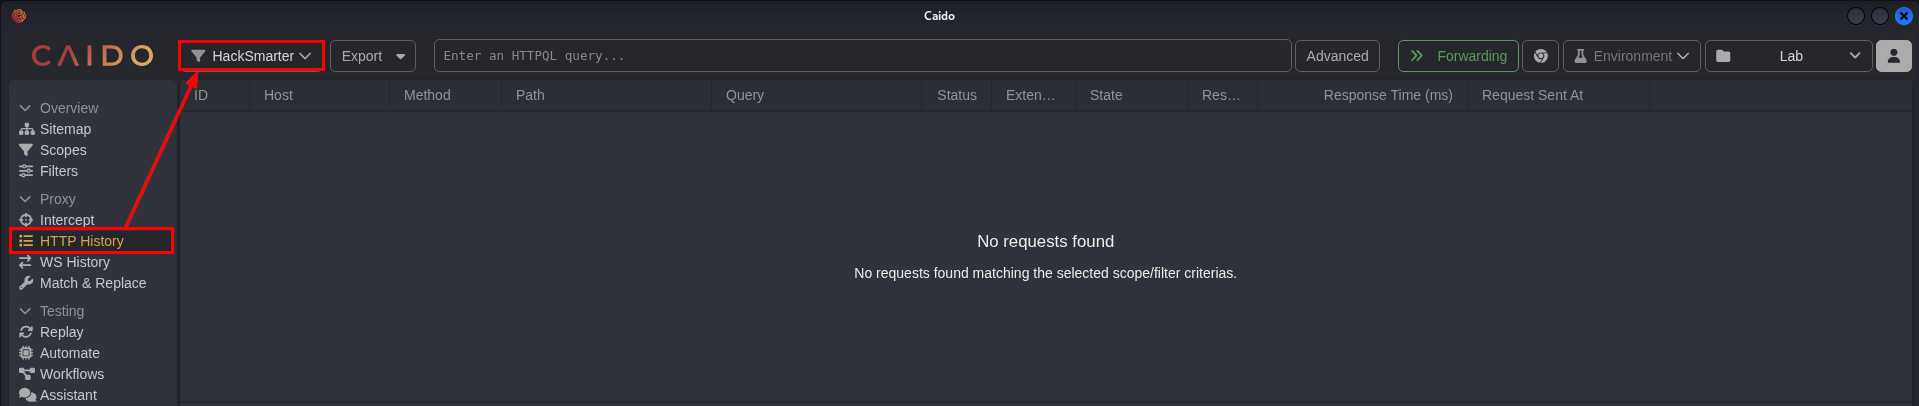
Filter HTTP requests to only show in scope requests by clicking the filter icon beside the Caido logo and select the scope you’ve created previously or the scope that contains your target machine. We then went to the HTTP History to view all requests we’ve made to the target website.
Navigating to the Login portal and capturing requests
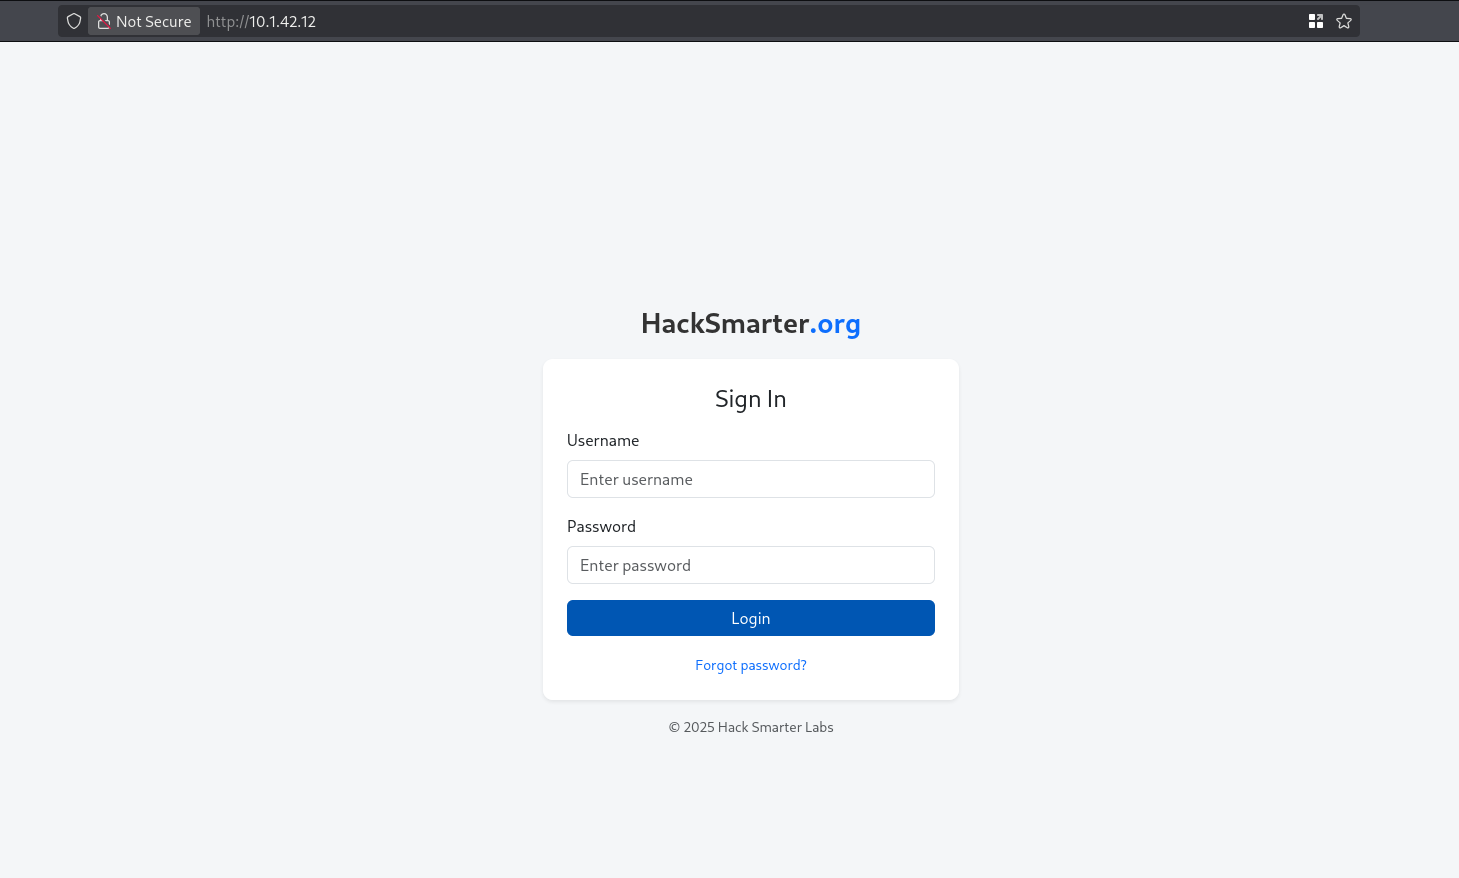
We then accessed the website and started capturing requests. We are greeted with a login page and we entered the first username (james) in the list that our OSINT analysts provided and we also entered a password of 123456.
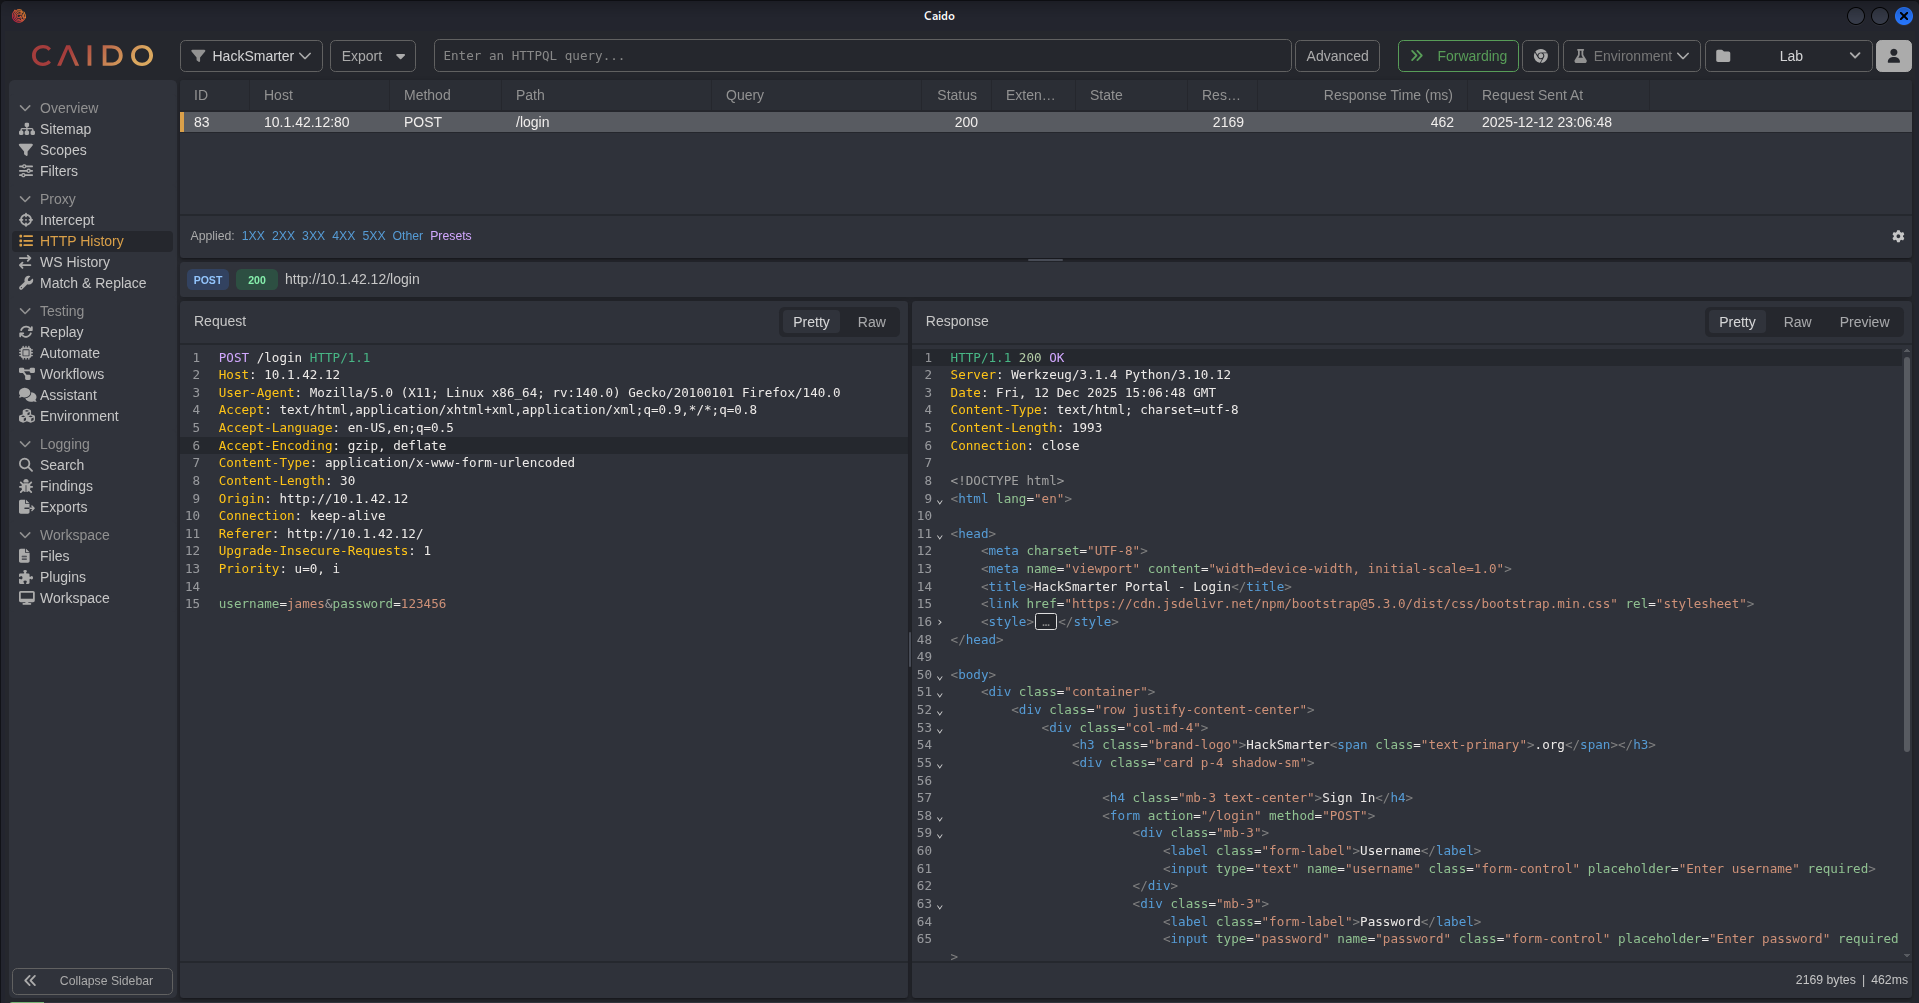
What we are initially looking for when enumerating users via login page is to see if there are any error messages that tells us “username invalid” or “invalid password” or anything that differentiates an existing user to a non-existing user, but after logging in using james:123456, we did not receive any error messages and just got redirected back to the login page. This makes it harder for us to enumerate users.
We then looked for the captured request to see if there are anything that’s interesting but we haven’t found anything that stood out.
Navigating to the Reset Password portal and capturing requests
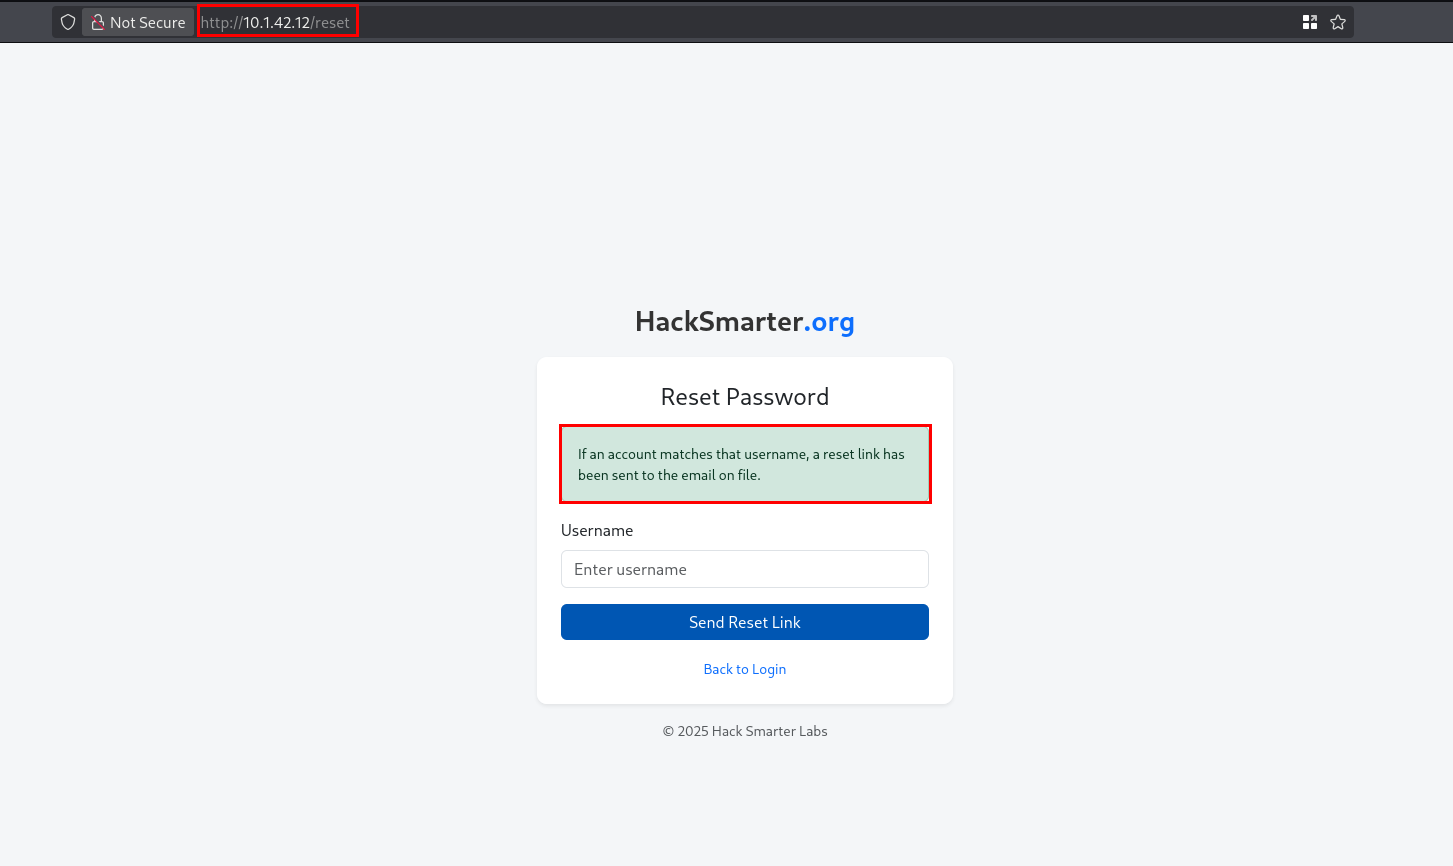
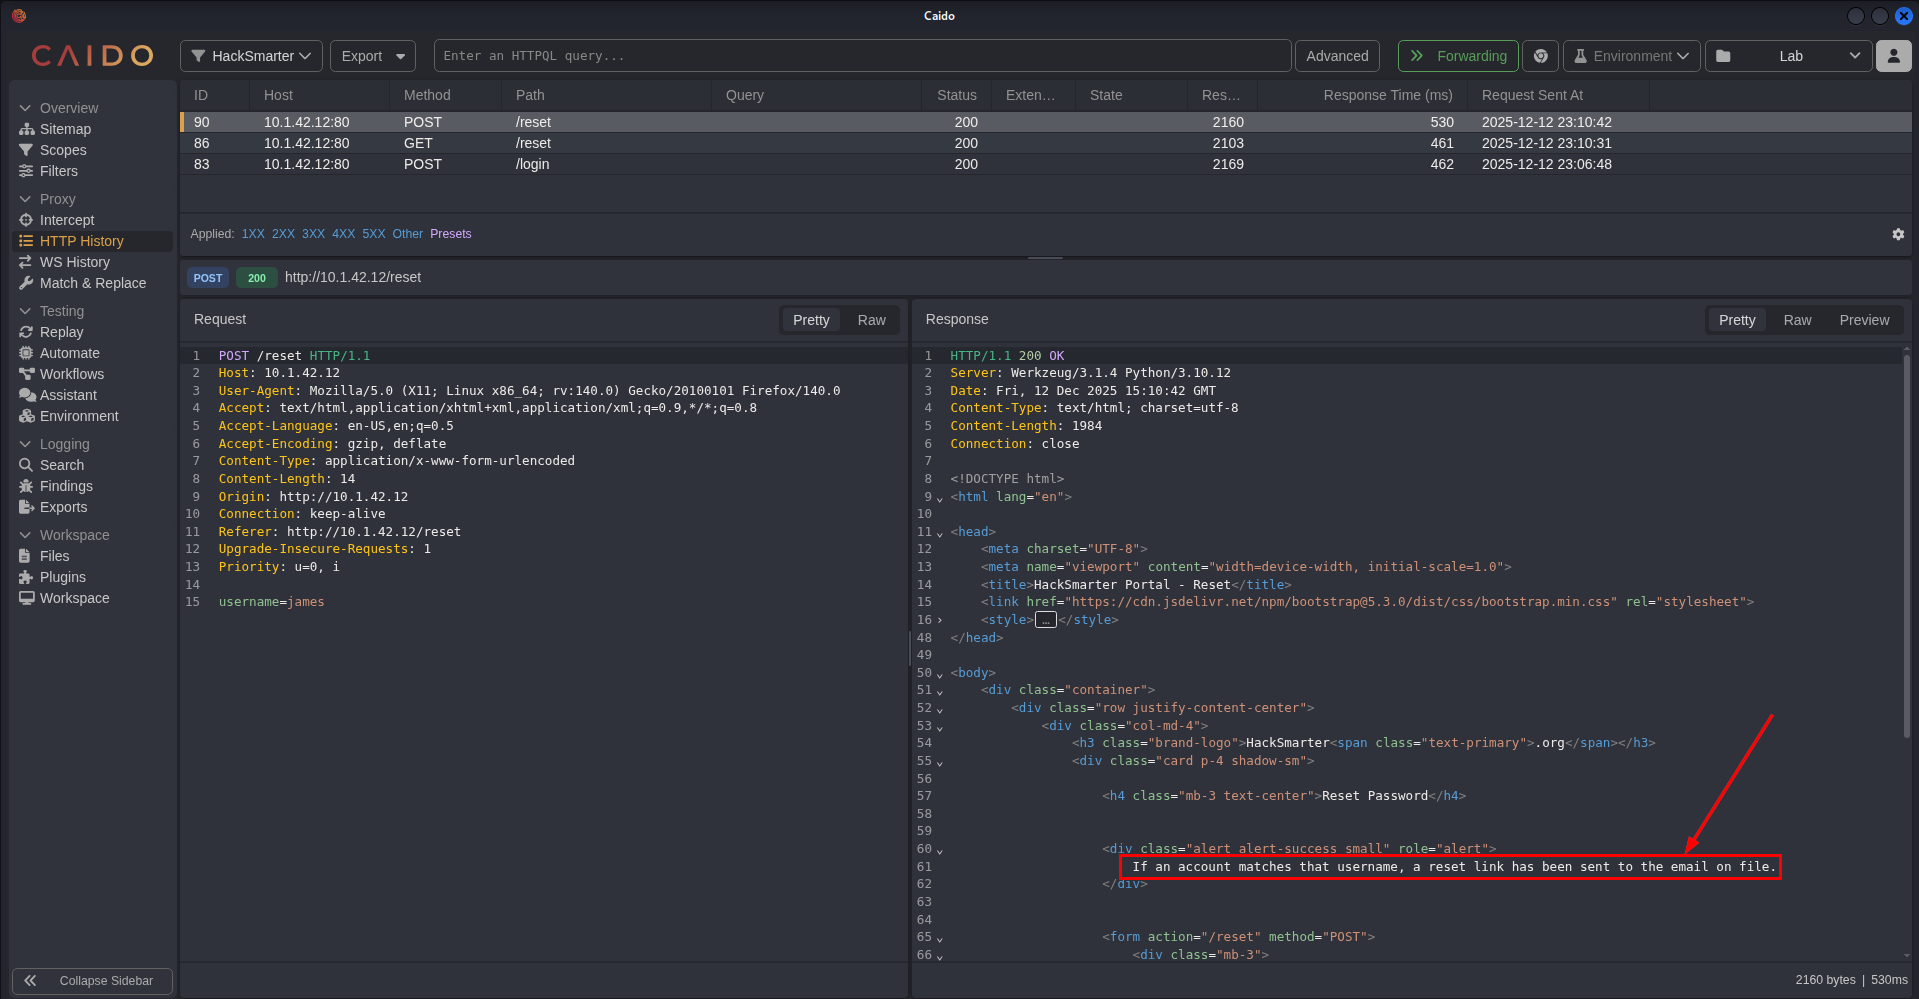
We then went to the Reset Password page (/reset) and performed the same thing we did with the login page to see if there are any unique messages that will show up such as “invalid user” or “password reset link has been sent”, but we also got another generic message.
Looking again at the HTTP requests, nothing stood out.
Username Enumeration
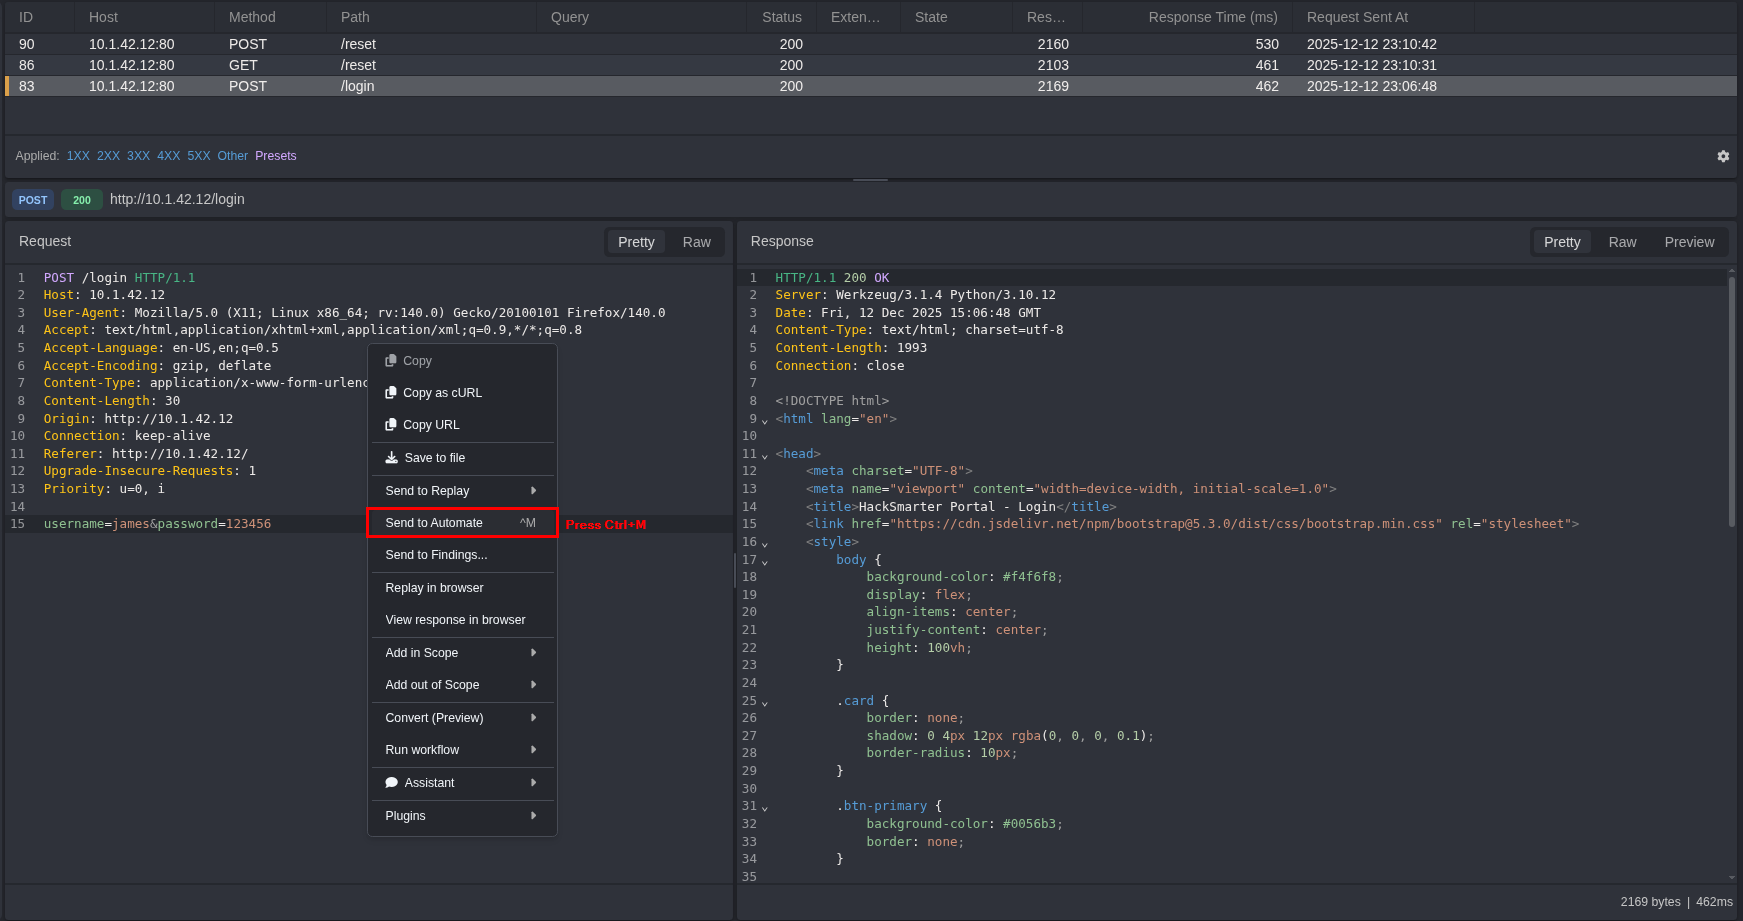
With no luck enumerating manually by checking for error messages, we will try testing all users in our usernames.txt list. We will be using Caido’s Automate feature to automatically send requests using our usernames payload. Select the request you want to automate and right click and select Send to Automate or simply press Ctrl+M.
What we are looking for here are noticeable change in Status, Content Length, or Response time. If there are changes to any of those, that tells us that the server processed that request in the backend and the payload (username) that was sent likely exist.
Setting up the payload
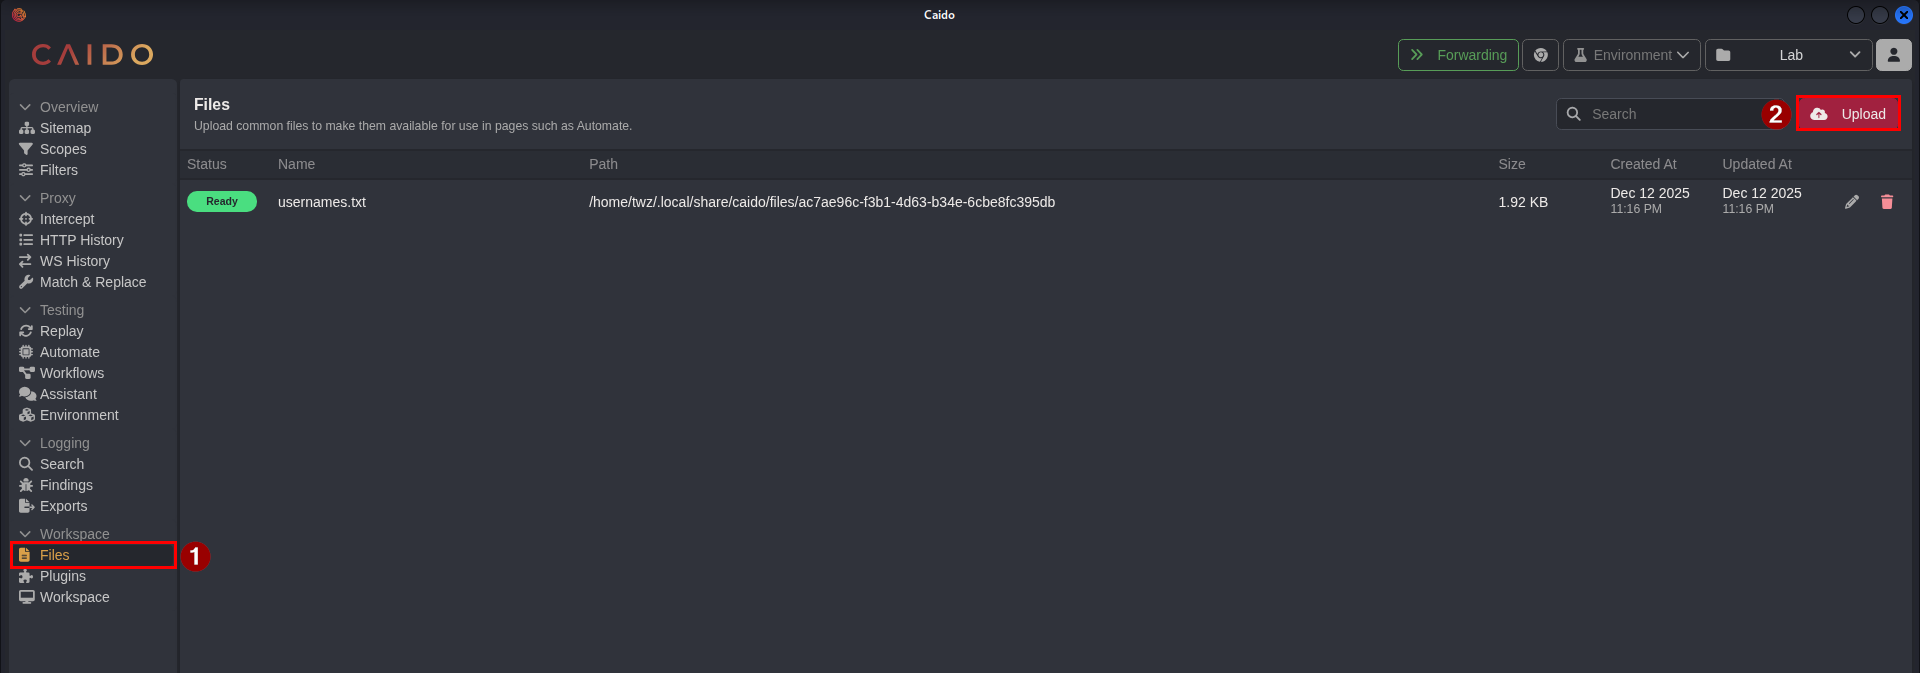
Before running Automate, we first need to upload our usernames.txt file to Caido for us to use as a payload when sending the requests. To upload the file, go the Workspace > Files and click the Upload button as shown in the screenshot below and select the usernames.txt file.
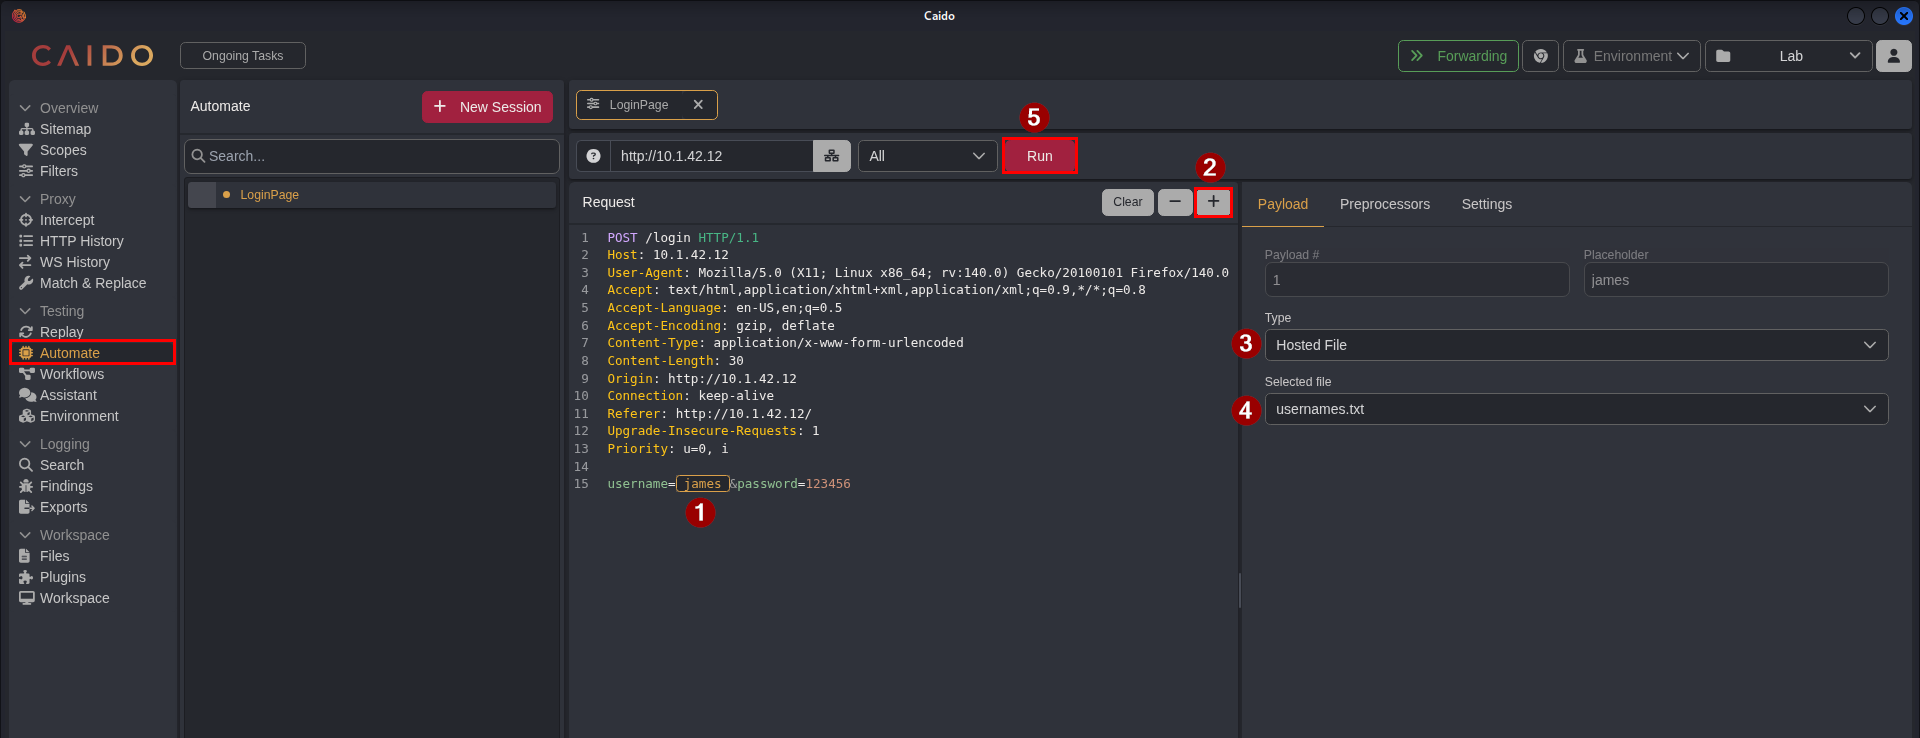
No we go to Testing > Automate to add our payload to the request and enumerate the users. Follow the steps below on how to set this up. Do the same for the Reset Password page as well.
Steps:
- Select the value of the parameter where you want the payload to go to. In this example we select/highlight
james. - Press the
+button to add this as a placeholder for our payload. - Go to the payload tab and select
Hosted Fileas the Type. - Select the
usernames.txtas our payload list. - Press the
Runbutton to start sending requests.
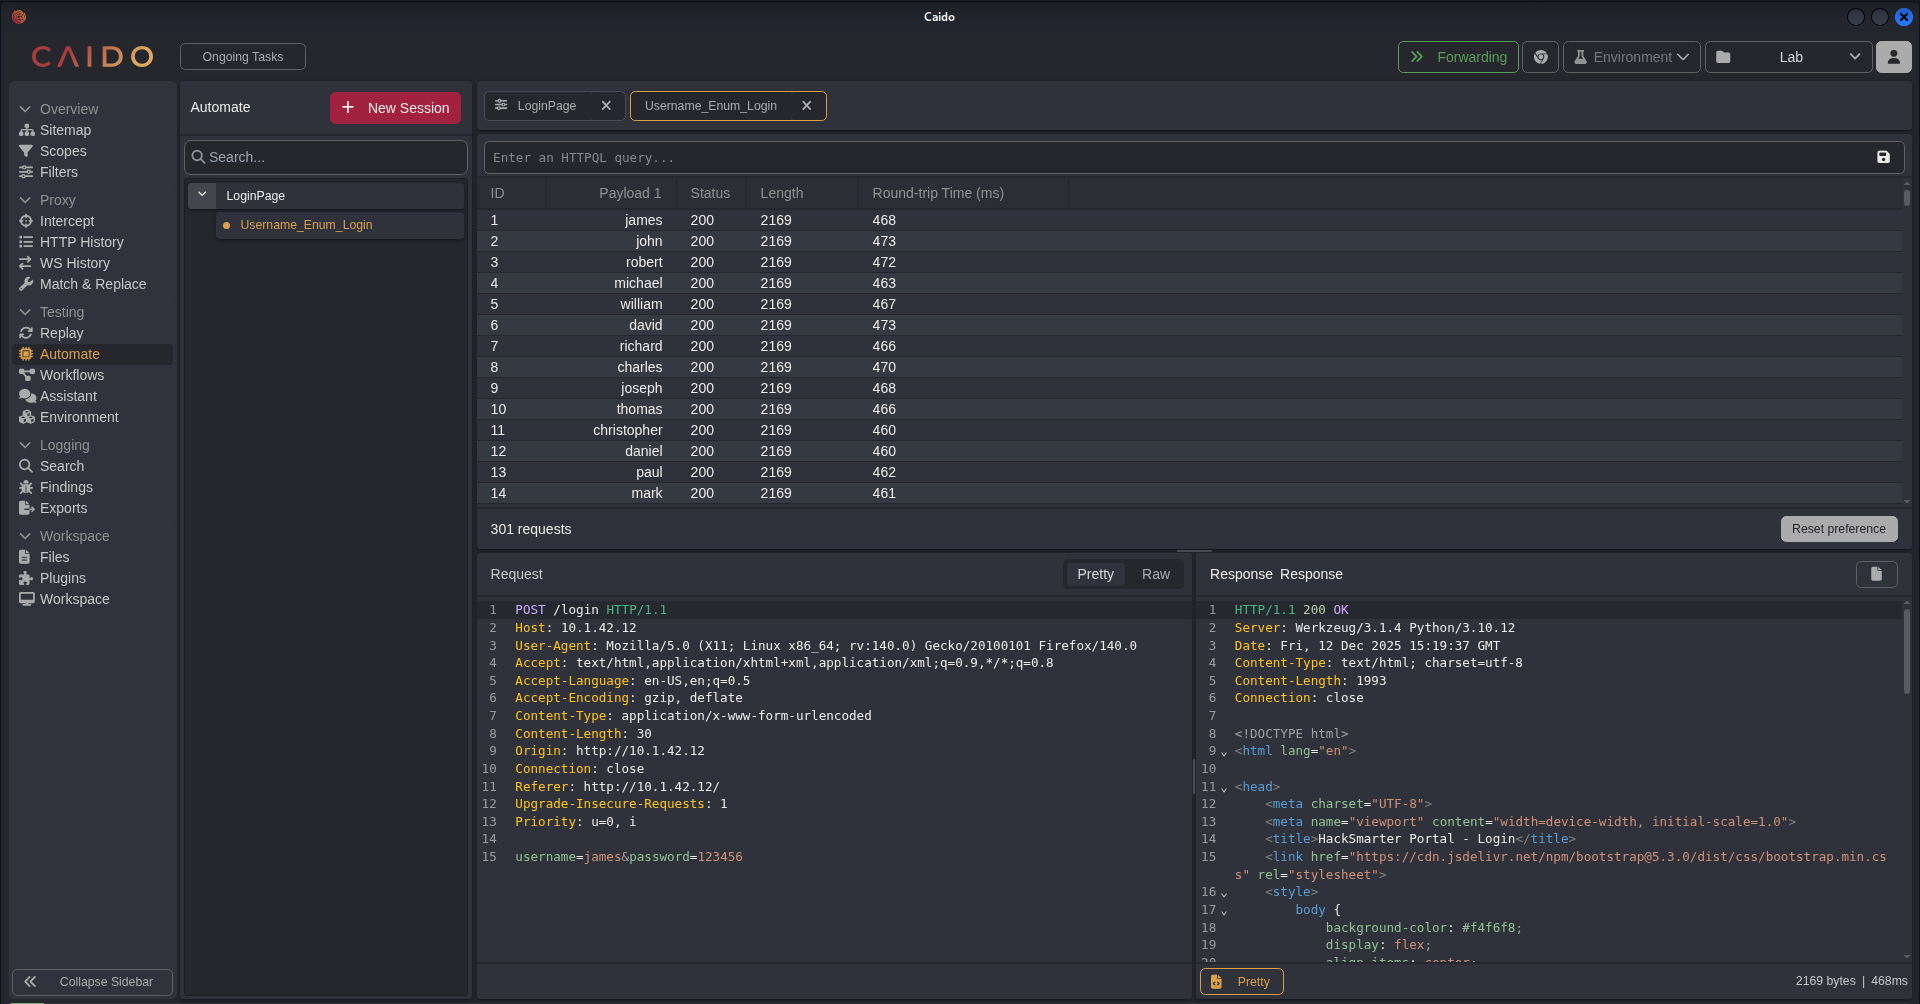
Username Enumeration on Login page
Checking the result of the requests for the Login page, we have not found anything that stood out. As mentioned earlier, we are looking for a noticeable change in the Status, Length, or Response Time (Round-trip Time). We tried sorting every column but nothing stood out.
Username Enumeration on Reset page
We then check the result of the requests for the Reset Password page, and after sorting all columns, one payload stood out for the Round-trip Time. As we can see on the screenshot below, most of the usernames have somewhat the same response time (<1000ms) except for one username which has a response time of 1362 ms.
What likely happened was that the server performed additional processes in the backend to perform the task of sending a reset link that’s why it took time to respond. This suggest that the username is valid.

Web Application Penetration Test Report
I’ve created a Web Application Penetration Test report for this lab, making it as realistic as possible using the current knowledge I have in creating a penetration test report. I used the template from TCM Security in creating this report. You can find the template here.
If for some reason the PDF report is not rendered, please download the report here.
Resources / References
- Burp Suite Web Security Academy. Authentication Vulnerabilities - Vulnerabilities in password-based login. https://portswigger.net/web-security/authentication/password-based
- Felipe Solferini (2025, November 9). Time based username enumeration. https://www.pentestpartners.com/security-blog/time-based-username-enumeration/
- OWASP Web Security Testing Guide. 4.3.4 Testing for Account Enumeration and Guessable User Account. https://owasp.org/www-project-web-security-testing-guide/latest/4-Web_Application_Security_Testing/03-Identity_Management_Testing/04-Testing_for_Account_Enumeration_and_Guessable_User_Account